PRACTICE RELOCATION SERIES

Office Design Diary: CHAPTER 5
The interior of the new practice begins to emerge as we settle on design elements.
BOBBY CHRISTENSEN, O.D., COREY CHRISTENSEN, O.D. & JOHN SMAY, O.D. Midwest City, Okla.
After a slow start on our new building project — thanks mostly to a very wet year in Oklahoma — the process is now starting to move quickly. At the end of our last installment, we were awaiting installation of the fire-suppression system and the sheet-rocking to begin. Both are now complete, and work has continued non-stop since then.
Interior investigation
Before the sheet-rocking actually began, we took several walk-throughs to make sure the framing was correct and that the layout would work the way we planned. We realized the framers had not built in the furdown (an area where the ceiling is lowered to reflect internal architecture) above the front desk — something clearly stated on the blueprints. So, we had them correct this oversight. Other small changes included making better use of some space in the office by changing the position of some doorways. We had the framers make these changes and build the furdown before sheet-rocking began.

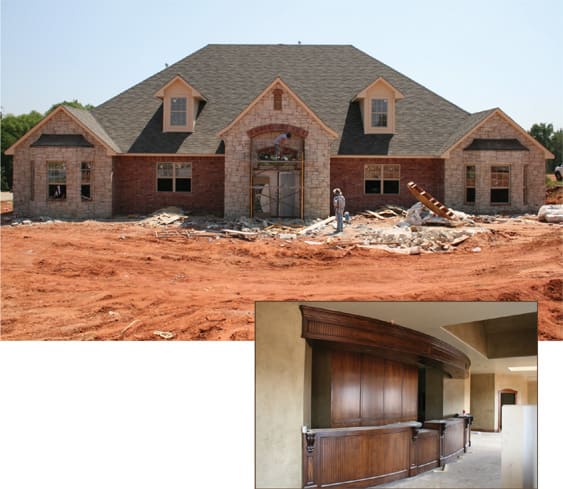
Top: The building's outside takes its final form. Right: The front desk.
The sheet-rock subcontractors had a 10-man crew who completed this phase quickly. The crew cut, put-up, taped and textured the sheet rock and it was ready within just a few days. It was nice to walk through rooms that had walls and get a real sense of how the new building would look.
Inside and out
Now, we met with and hired an interior designer to start coordinating the various paint- and stain colors, carpet- and tile type, texture, etc. Two weeks passed and we did not hear from her. We called and she reported that the project was too big for her, so she decided not to proceed. After that, we decided to use our best judgment and the input of several employees and family members to design the interior ourselves. (We will include some pictures with the next installment, so you can decide how we did.)
After the crew completed the sheet rock, it was time to begin the woodwork, cabinets, displays and desks. We met with the carpenter several times to ensure he would meet our interior woodwork needs. We drew cabinetry and other interior woodwork in to the original blueprints, and much of that remained unchanged. However, we made several changes, when faced with the actual area, as physically being there enabled us to visualize exactly what we wanted.
The carpenter was very helpful in suggesting cabinet- and desk positions. We went through the practice room-by-room and explained how we would use each room, using the original blueprint for reference. Then, we made changes to the blue-print that we felt were necessary. The carpenter took notes, made measurements and drew freehand on the walls to illustrate his ideas.

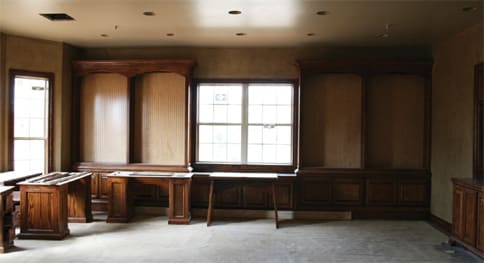
The frame styling area, seen here, will be visible as soon as patients enter the practice.

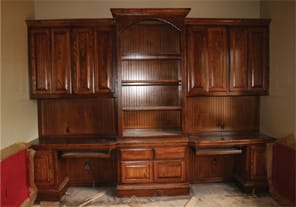
Drs. Christensen and Laverty's office only lacks staining on the floors.
Room-by-room
We have six exam rooms in our current office that are all slightly different sizes and shapes. All the doctors agree that one room, in particular, is the best in terms of size and layout. We took the trim carpenter to our old office to show him all the exam rooms including the "favorite" room. He made a few suggestions about the general layout of the exam-room cabinetry, and we settled on a design that would be used for all 11 exam rooms in the new building. All the exam rooms will be identical and hopefully all of them will be viewed with the same favor.
We also decided to let this carpenter build our frame-display cases rather than use commercially available products. We've visited new offices that have custom cases and some with commercial cases, but we felt a carpenter could create a much nicer product. So, we showed the carpenter pictures from several trade magazines and other office dispensaries that we had visited to give him a few ideas. He was then able to draw freehand sketches of displays based on these photos and our input. We spent quite a bit of time with him fine tuning the look and position of the displays. Since we were basically able to design our own cases, we were very pleased with the way the new dispensary turned out.
Employee input
Before any of the carpentry work actually began, we asked several of our employees to spend some time with the carpenter at the new office to ensure their new work areas would be comfortable in terms of ergonomics and practice navigation. This allowed the employees to make suggestions about exactly what they would need for their area, and for us to make necessary changes based on their feedback. Getting input from these employees proved to be very important, as they were able to make suggestions about desk height, foot-well positions and other small work-area details that we would've overlooked. It also allowed the employees to be involved and invested in the ultimate look and feel of their new building.
The biggest challenge for the carpenter was our front desk. The front desk is essentially a long arc spanning about 30 feet. No framing was necessary here, so the carpenter built the front desk by hand, literally from the floor up. He spent many hours getting the arc just right. In fact, most of the time he spent on our building was dedicated to this task. We gave him some general guidelines about the look we were trying to achieve and then let him use his skills and artistic ability to create it.
| We've brought various people in and the most common response so far has been, "Wow!" |
We were very pleased with the finished product. It's the first thing patients will see when they enter the front door. We've brought various people in, and the most common response so far has been, "Wow!" Needless to say, we have been very impressed with this carpenter.
With the trim carpentry complete, it was time to paint. We obtained four possible color samples and painted a few feet of wall space to see which we liked best. We also stained some scrap wood to determine a stain color. With the painting started, it was time to start making difficult choices, such as type of tile, carpet, fixtures, lighting, hardware, countertops and many other elements that we will have to live with for years to come.
In the next installment of this series, we'll discuss the decision-making process we used to settle on these details. Stay tuned! OM
| Dr. Christensen specializes in contact lenses and primary care. He is senior vice president of Vision Source, L.P. Dr. Christensen is a 2004 graduate of Northeastern State College of Optometry. Dr. Smay is a 1996 graduate of Northeastern State University College of Optometry. |


